 Click on the Category button to get more articles regarding that product.
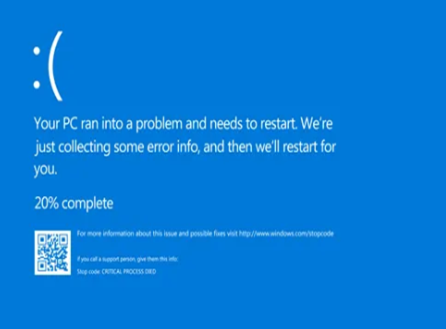
The falcon has crashed
BSOD blue screen of death on clients and server OS
Red Teams and Hackers > see where you have brought us?
|
|
|
|


https://www.trellix.com/about/why-trellix/vscrowdstrike/
The latest CrowdStrike Falcon Sensor update is causing a widespread issue resulting in a Blue Screen of Death (BSOD) boot loop globally. It’s a security professional’s worst nightmare come true. Ransomware gangs push for the release of definitions and patterns faster and without thorough risk analysis. Zero-day detection is real-time and cloud-based. To be honest, this could happen to any advanced security product.
Maybe CrowdStrike will tell us if AI helped to generate the latest definitions?
At least everyone is talking about it or every sales uses it? Check their website it says there….
False positives are a daily occurrence, and making a security product consumer-friendly (without requiring internal IT expert knowledge) while catching all zero-day threats is complex and almost impossible. What happens when you push paranoia beyond its limits? Just where we are right now today.
Both workarounds (Safe Boot for deleting a file or changing the main security product service status) should NOT be possible if everything is configured correctly. If first-level IT support can do that, attackers can potentially do the same, especially in environments like home offices or publicly exposed clients such as airport display terminals when not locked away high secure.
This comes just at the right time before complete paranoia and IT doing nothing else than this full month:
a) Patching Vmware Vventer each month because it could be attacked internal
b) Patching Exchange DAG clusters and OS
c) Reading daily M365 outtage news after you searched for half a day on a customer problem
c) Updating firewalls without 100% analyse if all policy work 100% as they did before
c) Making everything more complex and locking down everything so IT itself can’t use systems in an emergency (PAM/CERTS)
d) Running like monkeys behind each zero-day from every producer because it could 0.1% be an internal LAN attack or letting external Red Teams scan every corner of your enterprise network starting from every VLAN internally.
Maybe this hopefully will stop some process….
|
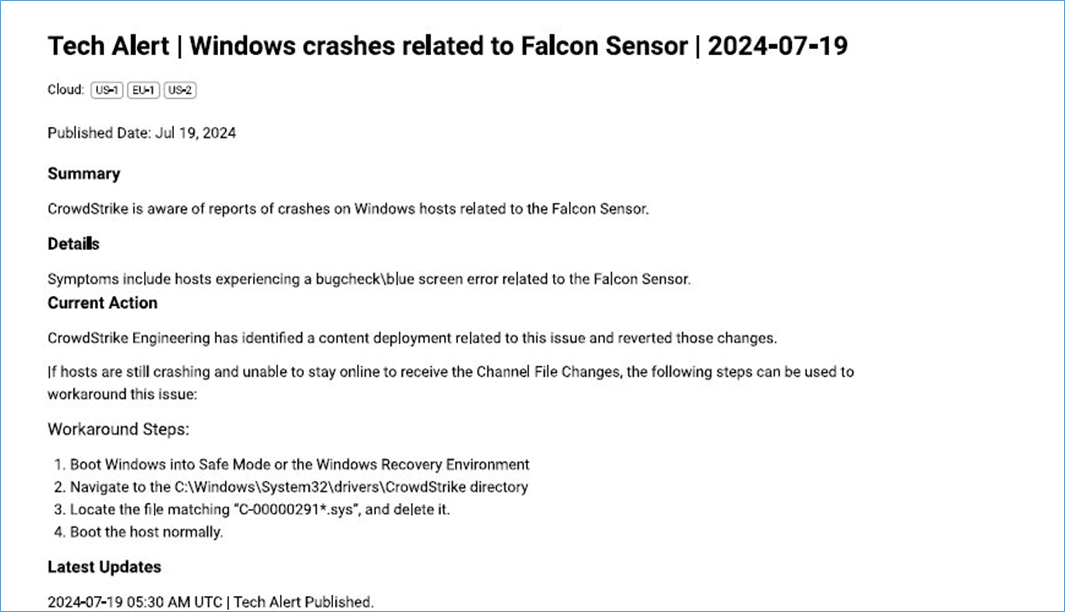
Windows hosts which have not been impacted do not require any action as the problematic channel file has been reverted.
|
Workaround has to be done be IT in corporates:
You will have to Safe Boot / Recovery to your Client / Server OS
|
DO not delete the FULL C:\windows\system32\drivers\Crowdstrike Folder it will get re-created: del only the file C:\windows\system32\drivers\Crowdstrike\C-00000291*.sys (time 19.07.2024 0409 UTC is the problematic version)
|
|
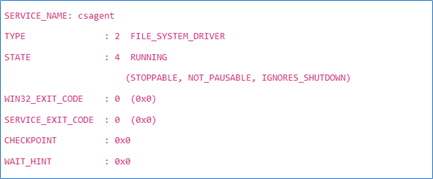
Change the Crowdstrike Falcon Service so it does not happen again?
HKEY_LOCAL_MACHINE\SYSTEM\CurrentControlSet\Services\CSAgent Change from 1 to 4 (Disabled) |
|
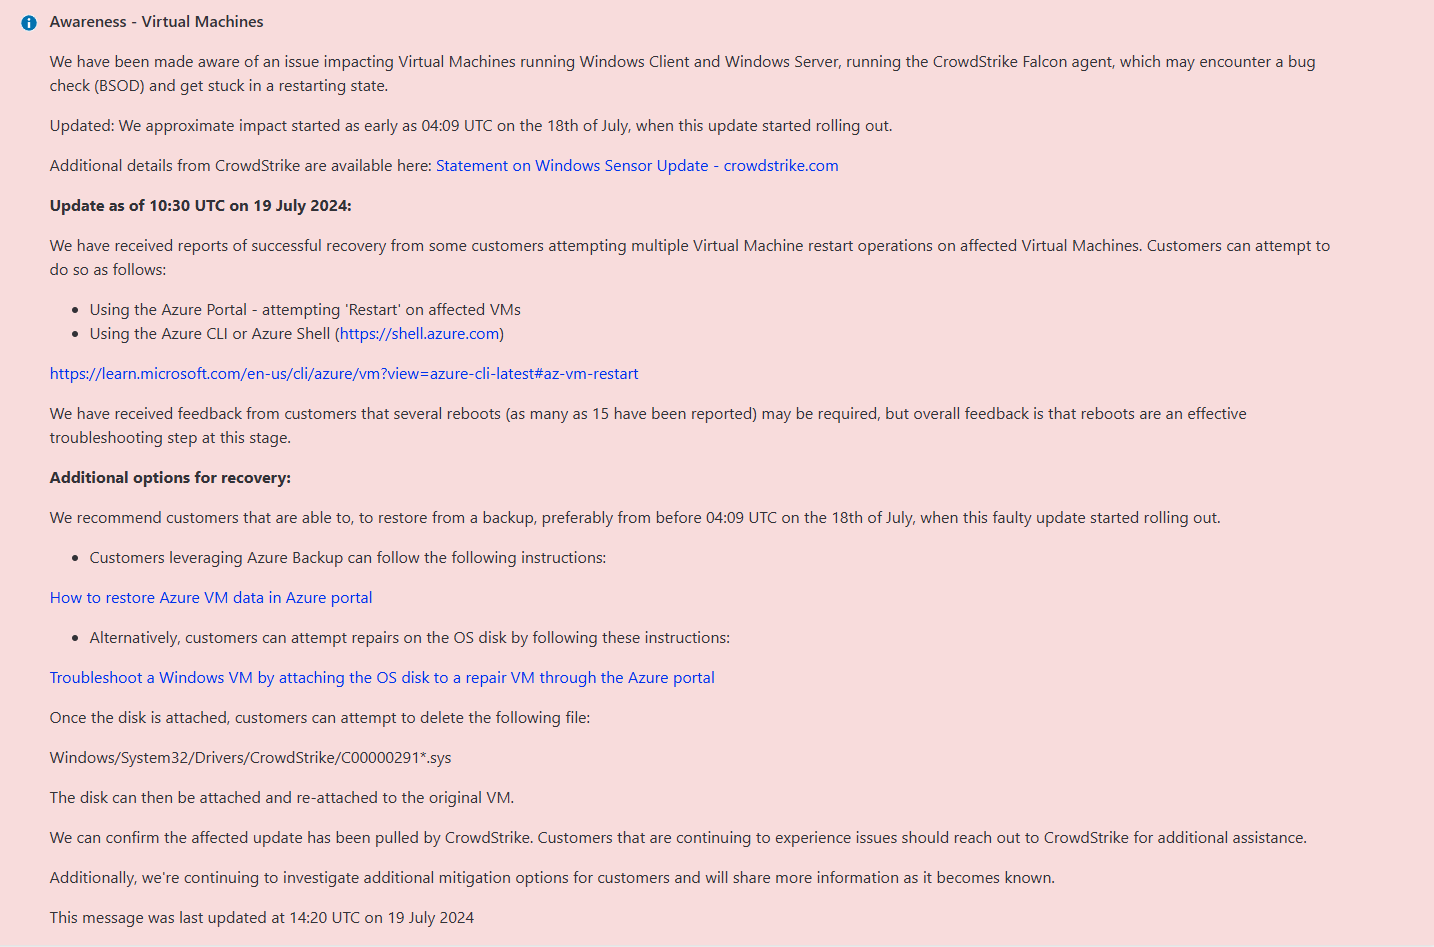
MS says for their AZURE machines just restart the Servers up to 15+ times and with good luck it is solved (See last screenshot here below)
We have seen things like this since server 2016 with BSOD and repair trys in our labs. Suddenly the system HIT some failure/Event max and tried other steps to recover itsefl or MORE agressive ways. Like the Exchange Healtcare Logik. We are unsure from up which OS release this was but we think SRV 2016+.
|
|
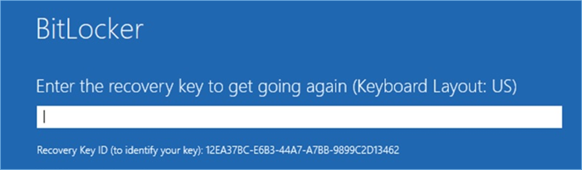
If your client has Bitlocker encryption you need the BITLOCKER recovery key
This needs to be extracted by IT from Active Directory and is a long password.
|
|
If you can’t access Active Directory because you had a) Bitlocker on DC/CA/PKI Server b) Isolated all with Certs and some Low level least permission (PAM) maybe you are at the point were some old school people told you? End of game… (Youre Red Team consultants won!) I am sure you also installed Falcon and Bitlocker on your VEEAM main and proxy servers?
If IT can’t access on-premises Active Directory and has not exported BitLocker keys as a backup, it’s the end of the game.
No, cloud will not help if sales tells you now. Even Microsoft was affected 😉 We thought MS had a better security product, so why were they affected? Because you can bring your own Software to Azure.
You could export recovery and TPM keys for years with a lot of troublesome low-level deployment work. You even had to downgrade BIOS and TPM chip versions. But then Microsoft came out with some BitLocker Administration Server for a huge amount of money. Also, security Red Teams advised against exporting or dumping BitLocker keys from Active Directory for security reasons.
With the new Active Directory version, you were once unable to export the keys without the BitLocker Server. Nobody cared, and everyone wanted easy solutions that are handy for first-level support.
The outcome you see now…
|
|
See related Bitlocker Links at end of document provided without Logon to Crowdstrike Can it get Worse than typing Bitlocker Recovery keys or NOT exporting them?
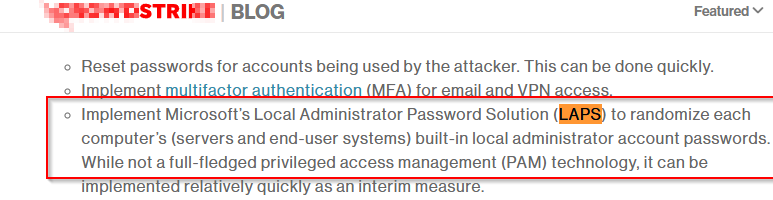
You integrate LAPS also on Servers because Red Team told you so? Any i mean it’s safe who EVERY needs to type a password again with Bom*/Beyo*st. The Breakglass account is in the safe and nobody has the key?
LAPS, Microsoft Local Admin Password Service
https://learn.microsoft.com/en-us/windows-server/identity/laps/laps-overview
|


If you are Windows 10, Windows 11, or Windows Server machine is unable to boot normally, you can still access Recovery Mode or Safe Mode to troubleshoot and fix the issues. This guide covers how to enter these modes when your system will not boot.
Booting into Recovery Mode
Recovery Mode provides tools to troubleshoot, repair, and restore your system. Here is how to access it when your computer is unable to boot:
Using Automatic Repair Mode
1. Trigger Automatic Repair Mode:
- Turn on your computer.
- As soon as the Windows logo appears, press and hold the Power button to force shutdown.
- Repeat this process two or three times. On the third restart, Windows should enter Automatic Repair Mode.
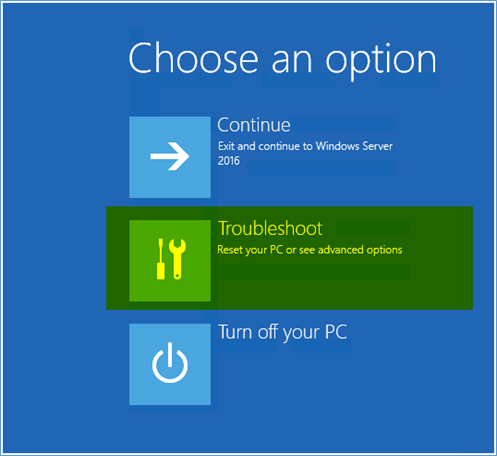
- Once in Automatic Repair Mode, select Advanced options to access the Windows Recovery Environment (WinRE).
Using Installation Media
1. Create Installation Media:
-
If you do not have a bootable USB drive, you can create one using the [Windows Media Creation Tool on another working computer.
2. Boot from Installation Media (Only works if not blocked by BIOS or Bitlocker)
Common boot menu keys
The boot menu keys vary per manufacturer. These keys are commonly used. Check the PC documentation to determine what boot key is used.
Frequently used boot menu keys are:
F12, ESC, F9, F10, F8
Common UEFI (BIOS) setup keys
UEFI (BIOS) setup keys vary per manufacturer. These keys are commonly used. Check the PC documentation to determine what setup key is used.
Frequently used UEFI (BIOS) setup keys are:
ESC, DEL, F2
- Insert the bootable USB drive or DVD into your computer.
- Restart your computer and press the appropriate key (usually F12, F2, ESC, or DEL) to enter the boot menu.
- Select the USB drive or DVD to boot from it.
3. Access Recovery Options:
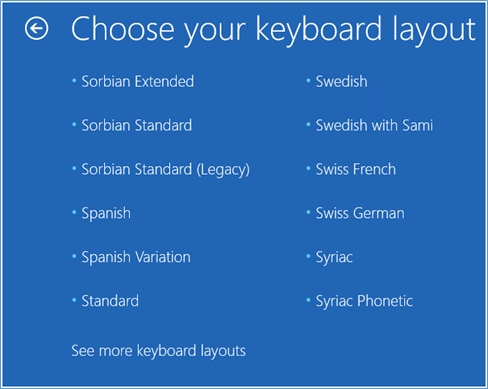
- On the Windows Setup screen, select your language and preferences, then click Next.
- Click Repair your computer to enter the WinRE.
Booting into Safe Mode
Safe Mode starts Windows with a minimal set of drivers and services, making it easier to troubleshoot issues. Here is how to access Safe Mode when your computer is unable to boot:
Using Recovery Mode
1. Access Recovery Mode (as described above).
2. Navigate to Safe Mode:
- In the WinRE, select Troubleshoot > Advanced options > Startup Settings > Restart.
- After your computer restarts, you will see a list of options. Press F4 to boot into Safe Mode, F5 to boot into Safe Mode with Networking, or F6 to boot into Safe Mode with Command Prompt.
Using Installation Media
1. Boot from Installation Media (as described above).
2. Access Command Prompt:
– On the Windows Setup screen, select your language and preferences, then click Next.
– Click Repair your computer to enter the WinRE.
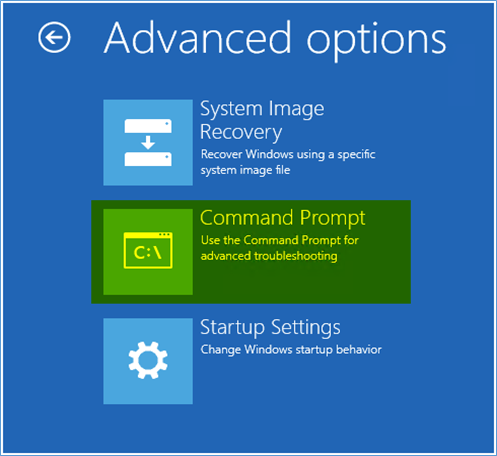
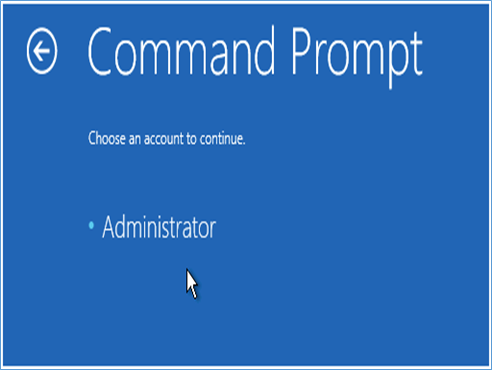
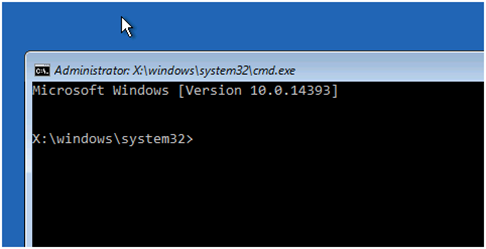
– Select Troubleshoot > Advanced options > Command Prompt.
3. Enable Safe Mode:
– In the Command Prompt window, type the following command and press Enter:
|
bcdedit /set {default} safeboot minimal |
– Close the Command Prompt and restart your computer. It will boot into Safe Mode.
– To disable Safe Mode later, use the Command Prompt in WinRE and type:
|
bcdedit /deletevalue {default} safeboot |
Disable the Crowdstrike Service complete
If your Windows 10 system is experiencing BSODs due to the CSAgent service, you can block this service by modifying the Registry. Here’s how:
1. Restart Windows 10 and Access Safe Mode:
– Restart your computer.
– Continuously press the F8 key until the Advanced Boot Options menu appears.
– Select Safe Mode from the menu and press Enter.
2. Open Registry Editor:
– Press Win + R to open the Run dialogue box.
– Type `regedit` and press Enter to open the Registry Editor.
3. Navigate to the CSAgent Service Key:
– In the Registry Editor, go to the following key:
HKEY_LOCAL_MACHINE\SYSTEM\CurrentControlSet\Services\CSAgent
4. Modify the Start Entry:
- In the CSAgent key, locate the Start entry in the right-hand pane.
- Double-click on Start to edit its value.
- Change the value data from `1` (which means the service starts automatically) to `4` (which disables the service).
5. Save and Exit:
- Click OK to save the changes
- Close the Registry Editor
6. Restart Your Computer:
– Restart your computer normally to apply the changes.
By following these steps, you should be able to prevent the Crowdstrike Agent service from starting and causing the blue screen of death.
Affected files:
|
Basic properties MD5 7999163535bddfe99d87731dca7bd4bb
SHA-1 5e718a3d9925ae99f73fd3bb3d872e62f1f17531
SHA-256 e50deca54e79c37a0360a6995cc54f8b2371c364e3a56957641cfb54dd50c600
Vhash 0460d6655d156575766caz16zffxz
Authentihash cd78b5115d40a2bd6ffce7275056f5e9d2ba484357a2bd599a3928051a94a46a
Imphash 3a6866fb9b848d00d710c78554db4803
Rich PE header hash bc1678dde4bf150709650c08ce001d47
SSDEEP 49152:mizYu995VodxtS8/+szI7QnUrl1JJA+mHUSn9X81k56ngJos2dfJc+dzaFEtsx9c:H8IXJuruJp5eEmgJdYi
TLSH T121268D19A2EC11BDC0FAC97D85668416E7B2BC150B22AFC71160C63BAF1F3E9197D316
File size 4.24 MB (4440760 bytes) History Creation Time, 2024-07-09 01:40:19 UTC Signature Date, 2024-07-09 14:00:00 UTC First Submission, 2024-07-18 21:44:34 UTC Last Submission, 2024-07-19 12:24:22 UTC Last Analysis, 2024-07-19 15:47:10 UTC Names CSAgent.sys 123.sys 4CC96E0382282393F304A360A1FE36412EE33827.sys Signature info Signature Verification, Signed file, valid signature, File Version Information, Copyright (c) CrowdStrike, Inc. All rights reserved. Product CrowdStrike Falcon Sensor Description, CrowdStrike Falcon Sensor Driver
Original Name
CSAgent.sys Internal Name
CSAgent.sys File Version 7.15.18513.0 Date signed 2024-07-09 12:00:00 UTC |
Workaround Server / Vmware affected with NO Recovery Option and not encrypted:
To move a virtual disk from one server to another in a VMware environment and modify a file on the disk, follow these steps:
1. Detach the Disk Volume:
- Power off the impacted virtual server.
- Open the VMware vSphere client and navigate to the affected VM.
- Select the VM, go to “Edit Settings,” find the disk you want to detach, and remove it. Ensure you do not delete the disk from the datastore, just remove it from the VM configuration.
2. Create a Snapshot or Backup:
- Before proceeding, create a snapshot or backup of the disk volume to prevent data loss in case of unintended changes.
3. Attach the Disk to a New Virtual Server:
- Navigate to the new virtual server where you want to attach the disk.
- In the vSphere client, go to “Edit Settings” for the new VM.
- Click “Add” to add a new hard disk and choose “Use an existing virtual disk.”
- Browse to the location of the detached disk and add it to the new server’s configuration.
4. Modify the Required File:
- Power on the new VM with the attached disk.
- Once the VM is running, access the file system of the attached disk.
- Navigate to the directory where the required file is located, for example: `C:\Windows\System32\drivers\CrowdStrike`.
- Locate and delete the problematic file (e.g., `C-00000291*.sys`).
5. Detach and Reattach the Fixed Volume:
- Power off the new VM.
- In the vSphere client, remove the disk from the new VM configuration without deleting it from the datastore.
- Go back to the original impacted VM and reattach the disk by adding an existing virtual disk and selecting the fixed volume.
6. Power On the Original VM:
- Start the original VM and verify that the changes have resolved the issue.
This procedure ensures that the problematic file is removed while keeping data integrity intact. It leverages VMware’s flexibility in handling virtual disks, allowing you to modify the disk contents by temporarily attaching them to another VM
AWS-specific documentation:
To attach an EBS volume to an instance:
Detach an Amazon EBS volume from an instance:
https://docs.aws.amazon.com/ebs/latest/userguide/ebs-detaching-volume.html
Bitlocker recovery
related KB‘s:
BitLocker recovery in Microsoft Azure: https://www.crowdstrike.com/wp-content/uploads/2024/07/BitLocker-recovery-in-Microsoft-Azure.pdf
BitLocker recovery in Microsoft environments using SCCM: https://www.crowdstrike.com/wp-content/uploads/2024/07/BitLocker-recovery-in-Microsoft-environments-using-SCCM.pdf
BitLocker recovery in Microsoft environments using Active Directory and GPOs: https://www.crowdstrike.com/wp-content/uploads/2024/07/BitLocker-recovery-in-Microsoft-environments-using-Active-Directory-and-GPOs.pdf
BitLocker recovery in Microsoft environments using Ivanti Endpoint Manager: https://www.crowdstrike.com/wp-content/uploads/2024/07/BitLocker-recovery-in-Microsoft-environments-using-Ivanti-Endpoint-Manager.pdf
BitLocker recovery: known issues – Windows Client | Microsoft Learn
And now, postdrama?
Maybe think about using the leader in Enterprise security? Trellix? From a security engineer perspective they have multi OS protection and have low level Disk enryption and DLP software > So this should NOT happen to them.
https://www.butsch.ch/post/category/security/mcafee-ens-epo-dlp-tie-atd-vse-msme/
Links:
KEYS: DRIVER_OVERRAN_STACK_BUFFER
Sensor runs on:
- 64-bit server OSes:
- Windows Server 2019
- Windows Server 2016
- Windows Server 2012 R2
- Windows Server 2012
- Windows Server Core 2019
- Windows Server Core 2016
- Windows Storage Server 2012 R2
- 64-bit desktop OSes:
- Windows 10 November 2019 Update, also named v1909, or 19H2
- Windows 10 May 2019 Update, also named Redstone 6, v1903, or 19H1
- Windows 10 October 2018 Update, also named Redstone 5 or v1809
- Windows 10 April 2018 Update, also named Redstone 4 or v1803
- Windows 10 Fall Creators Update, also named Redstone 3 or v1709
- Windows 10 Creators Update, also named Redstone 2 or v1703
- Windows 10 Anniversary Update, also named Redstone 1 or v1607
- Windows 10
- Windows 8.1
Blue Screen of Death, BSOD, Stop Error, Bug Check, System Crash, Fatal System Error, Kernel Panic, ,Windows Stop Code, Crash Dump, Memory Dump, Error Screen, Blue Screen Error, System Halt, Critical System Error, Windows Crash, Hardware Failure, Software Failure, Driver Failure, System Fault, Critical Process Died, Inaccessible Boot Device